
Just like Windows, Microsoft’s Office programs offer a dark mode that is easy on the eyes in poor lighting conditions and reduces power consumption.
Let’s start with Word: To switch to dark mode, click on File -> Options and then make sure that you are in the General tab. Under “Personalize your copy of Microsoft Office” you’ll find the option “Office Theme”.
Set this to “Black”. If you have already set Windows to dark mode, you can also select “Use system settings”. Then confirm with “OK”. By default, the Word menus are now black, but the desktop still appears white with black text.
To change this, delete the tick in front of “Never change the document page color” and click “OK” again. The background is now black and the font is white.
You will find the same setting in the same place in classic Outlook. Here the option is called “Never change the background color of the message”. In the new Outlook, go to General -> Appearance in the Settings and next set the option “Dark” under Dark mode. The program automatically colors the background of mail black, there is no option to select this.
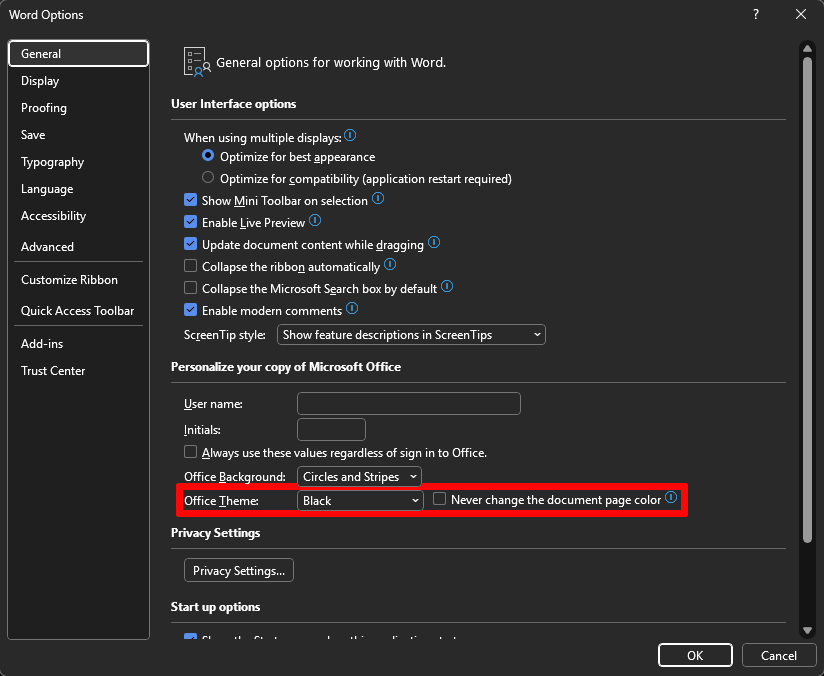
In Word, you can select whether the background of the workspace should also appear black or always remain white in dark mode.
Sam Singleton
Finally, although PowerPoint and Excel allow you to switch to a black office design, they are not able to darken the background of a presentation or spreadsheet. At least there is a temporary solution for Excel:
Open the Paint image editor included in Windows, click on Selection in the toolbar and draw a rectangle measuring approximately 250 x 200 pixels. The dimensions are displayed at the bottom of the status bar. Then click on the Crop icon in the “Image” section of the toolbar.
Then click on the Edit palette icon in the “Color” section, set 80 next to “Red”, “Green”, and “Blue” in the following window and confirm with OK. Then switch to the “Tools” section, click on the Fill tool and then on your rectangle.
Paint will then colour it a dark grey. Click on File -> Save and save the rectangle as a PNG file in a folder of your choice.
Now open your spreadsheet file in Excel. Switch to the “Page layout” ribbon, click on Background -> From a file and select the PNG file with the grey rectangle. Press the key combination Ctrl-A to select the table.
Then right-click within the selection. Two context menus will open. In the smaller one, click on the downward-pointing arrow next to “Font color” and then click on the white square under “Design color”. You have now created a manual dark mode with a white font color.
Please note: The setting only applies to this one spreadsheet. Every new sheet that you create will appear in the standard color again. And if you save the spreadsheet and pass it on, it will also open on another computer with a white background—but the white font will remain.
You or other users will therefore see white text on a white background, in other words: nothing at all. To change this, you must change the font color. Incidentally, dark mode has no effect on the printout of a spreadsheet.
This articles is written by : Nermeen Nabil Khear Abdelmalak
All rights reserved to : USAGOLDMIES . www.usagoldmines.com
You can Enjoy surfing our website categories and read more content in many fields you may like .
Why USAGoldMines ?
USAGoldMines is a comprehensive website offering the latest in financial, crypto, and technical news. With specialized sections for each category, it provides readers with up-to-date market insights, investment trends, and technological advancements, making it a valuable resource for investors and enthusiasts in the fast-paced financial world.