
PowerShell can seem like a tool for system administrators: with a black window, cryptic commands, and plenty of ways to get things wrong. Yet the Windows console can also be used for everyday tasks. You can use it to track down large files, list installed programs, or do a spring cleaning on your PC.
You don’t need to learn to program to do this. AI assistants such as ChatGPT, Gemini, or Claude can create suitable PowerShell scripts and explain them in a way that’s easy for beginners to understand. All you need to do is describe what you want to achieve in the Windows environment, check the generated code, and run it correctly. We’ll show you, using three specific examples, and how you can build such Windows tools yourself, even without any prior knowledge.
Note: We’re using ChatGPT for our examples. In principle, other AI assistants such as Gemini or Claude are also suitable. In practice, however, it does make a difference how cleanly the generated code can be copied over.
With ChatGPT, this usually works without any problems. When copying the code, however, make sure that formatting and special characters are copied correctly – even minor errors can prevent a script from working as intended.
1. Find PowerShell and try out your first command
PowerShell is already included in Windows 10 and Windows 11. Open the Start menu, type PowerShell into the search bar and launch Windows PowerShell. You won’t need administrator rights for our first examples. A console window will open where you can enter commands and run them by pressing the Enter key.
Start by trying out a simple command:
Get-DatePowerShell should then display the current date and time. As you can see, the principle is simple: You enter a command, PowerShell executes it and displays the result.
For recurring tasks, it’s more practical to save several commands in a single file. Such a script file has the extension .ps1 and can be run again and again as required. We’ll explain exactly how this works at the end of this article.
2. Using the right prompt to create a useful script
The more precisely you describe to the AI what the script is supposed to do, the better the result will be tailored to your requirements. Specify your operating system, explain the task you want to perform and, if necessary, specify what the script must not do — such as deleting files.
This basic prompt is a good place to start:
Create a PowerShell script for Windows 10 and Windows 11 that is as short and clear as possible and performs the following task:
[Describe the task]
I have no programming knowledge. Please omit any unnecessary additional functions. The script should run without administrator rights, must not delete any files or change Windows settings, and should respond appropriately in the event of any errors. Please then briefly explain how the code works, what prerequisites apply, and how I run the script.
Replace the placeholder with your specific task. For example: “Find large files in my user folder and sort them by size.” The AI will then generate the appropriate code. If necessary, you can ask what individual commands do or how the output can be made clearer.
Tip: Use PowerShell with care
PowerShell is a powerful tool that can make deep changes to Windows — particularly if you run it with administrator rights. You should therefore ask for an explanation of the generated code before running it, and ask for clarification if anything seems unclear. Our examples read information or launch programs without deleting files or changing Windows settings.
3. Practical example no. 1: Finding large files
When storage space is running low, it’s often down to individual large files or forgotten downloads. With PowerShell, you can search for them specifically, rather than clicking your way through numerous folders. We’ll first have the script search for files of 500 megabytes or more in your own user folder and sort the results by size.
Replace the placeholder in the basic prompt from Section 2 with this task description:
Search my user folder for files 500 MB or larger. Sort the results by size, starting with the largest file. Display the filename, full path and size in MB, and ignore access errors.
The generated code should look something like this:
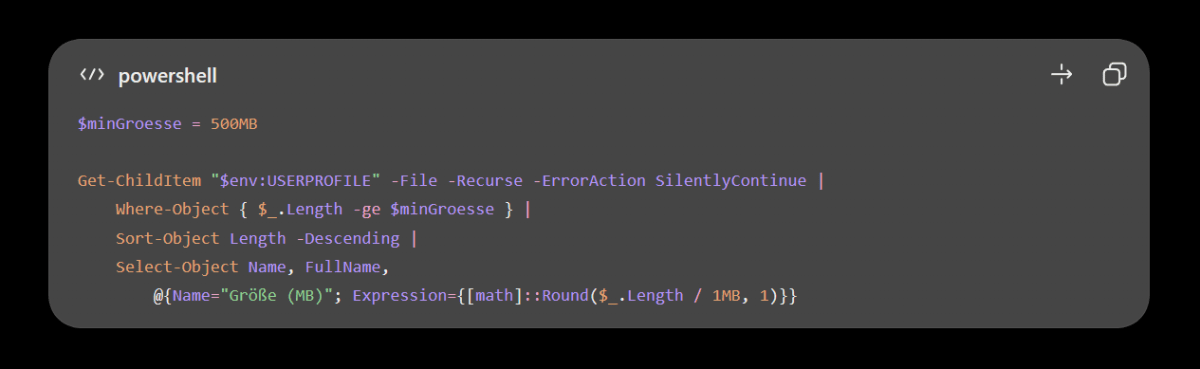
Foundry
Text to copy:
$minSize = 500MB

Get-ChildItem "$env:USERPROFILE" -File -Recurse -ErrorAction SilentlyContinue |
    Where-Object { $_.Length -ge $minSize } |
    Sort-Object Length -Descending |
    Select-Object Name, FullName,
        @{Name="Size (MB)"; Expression={[math]::Round($_.Length / 1MB, 1)}}
Explanation of terms (for those interested): You do not need to understand the individual commands in detail to use the script. However, if you would like to know what lies behind it:
- $env:USERPROFILE: refers to the personal user folder, which contains, for example, the Downloads, Documents, and Pictures folders.
- $minSize: sets the minimum size. Change the value to 100MB if you also want to find smaller files.
- Get-ChildItem: searches the user folder and its subfolders.
- Where-Object: filters the files by size
- Sort-Object: sorts the results by file size — starting with the largest file.
- Select-Object: specifies which details PowerShell outputs: filename, full path, and size in megabytes. Inaccessible files are skipped by the error handling, provided PowerShell can continue the search.
Here’s how to use the newly coded tool:
Open PowerShell, copy the entire code into the console window and press Enter. Depending on the number of files, the search may take a little while. The results appear directly in the window. If you wish to use the script again later, you can save the code as a .ps1 file. We explain how to do this below.
4. Practical example no. 2: Listing installed programs
Which programs are actually installed on your PC? A clear list helps you to document your software inventory or track down older applications. PowerShell can retrieve the relevant information and save it in a CSV file, which you can then open in Excel or another spreadsheet program.
Replace the placeholder in the basic prompt (section 2) with this task description:
Read the names, version numbers, and manufacturers of the installed desktop programs. Sort the list alphabetically by program name and export it to a CSV file on the desktop.
Many traditional desktop applications store their details in the Windows Registry. You can create the following script example — or something similar — using the customized basic prompt (or simply copy it from here). It reads entries and saves the results to a file on the desktop:
$paths = @(
    "HKLM:SoftwareMicrosoftWindowsCurrentVersionUninstall*",
    "HKLM:SoftwareWOW6432NodeMicrosoftWindowsCurrentVersionUninstall*",
    "HKCU:SoftwareMicrosoftWindowsCurrentVersionUninstall*"
)

$desktop = [Environment]::GetFolderPath("Desktop")

Get-ItemProperty $paths -ErrorAction SilentlyContinue |
    Where-Object { $_.DisplayName } |
    Select-Object @{Name="Programme Name"; Expression={$_.DisplayName}},
                  @{Name="Version"; Expression={$_.DisplayVersion}},
                  @{Name="Publisher"; Expression={$_.Publisher}} |
    Sort-Object Programme Name |
    Export-Csv "$desktopInstalled-Programmes.csv" -NoTypeInformation -Encoding UTF8 -Delimiter ";"
Explanation: The three registry paths cover system-wide 64-bit and 32-bit programs, as well as applications registered only for the current user account. DisplayName, DisplayVersion, and Publisher refer to the program name, version number, and publisher. Export-Csv saves the details to the file ‘Installed-Programs.csv’. The semicolon as a delimiter makes it easier to split the data into columns in a spreadsheet.
How to use the tool: Open PowerShell, copy the entire code into the console window, and press Enter. You will then find the file ‘Installed-Programs.csv’ on your desktop. You can open it in Excel, for example.
Tip: The list provides an overview of many classic desktop programmes. It includes applications that store their installation data in the Windows Registry. However, apps from the Microsoft Store or portable programmes may be missing if they do not create corresponding entries there.
5. Practical example no. 3: Opening programs and folders with a single click
Foundry
Starting the browser first thing in the morning, then opening the email program, and finally locating the project folder: These are the sort of tasks you repeat every day. A small PowerShell script can take care of these steps for you and open several programs and folders one after the other.
To enable the AI to create a suitable script, you’ll first need the paths to the relevant programs and folders. Find the application in the Start menu and open its location via the context menu. Tip: If you’re using a shortcut, you’ll find the full path to the program file in the ‘Target’ field under ‘Properties.’ This must also include the application’s filename, for example C:Program FilesMozilla Firefoxfirefox.exe. Copy the entire path and paste it into your command prompt. You can, however, copy the path of a folder directly from the address bar in File Explorer.
Replace the placeholder in the basic prompt from Section 2 with this task description:
Launch the following programs and open the specified folders:
Programs:
- [enter the full paths to the desired programs here]
Folders:
- [enter the paths to the required folders here]
Before each launch, check whether the specified path exists, and display a clear message if any paths are invalid.
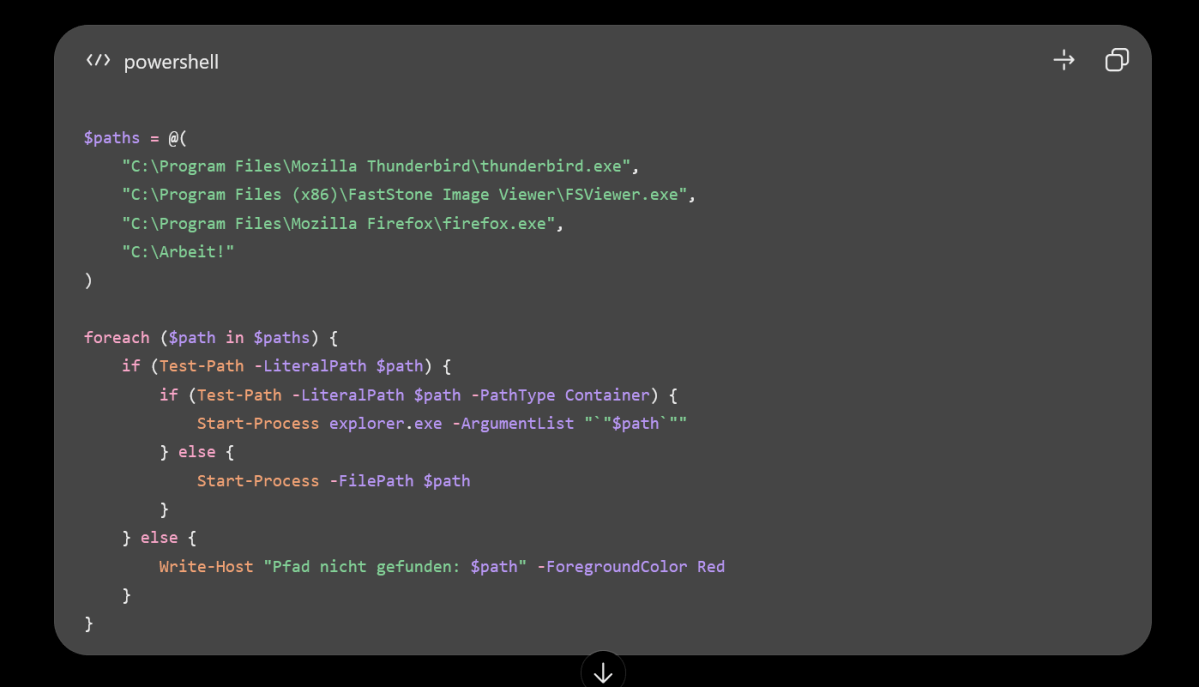
Based on this prompt, the AI generates a list of the paths to the desired programs and folders. The script then checks each entry: If it is a folder, it opens it in File Explorer; if it is a program file, it launches the corresponding application. If a path is invalid, PowerShell displays an error message.
Please note: For this launch assistant, it is not advisable to copy our example code unchanged: The installation locations of programs and personal folders vary from PC to PC. You should therefore have the script generated using your own paths and check whether the AI has incorporated them correctly.
Tip: If you wish to use your launch helper regularly, save it as a PS1 file. We explain how this works and how to run the script afterwards in the following section.
6. Saving and running scripts
Foundry
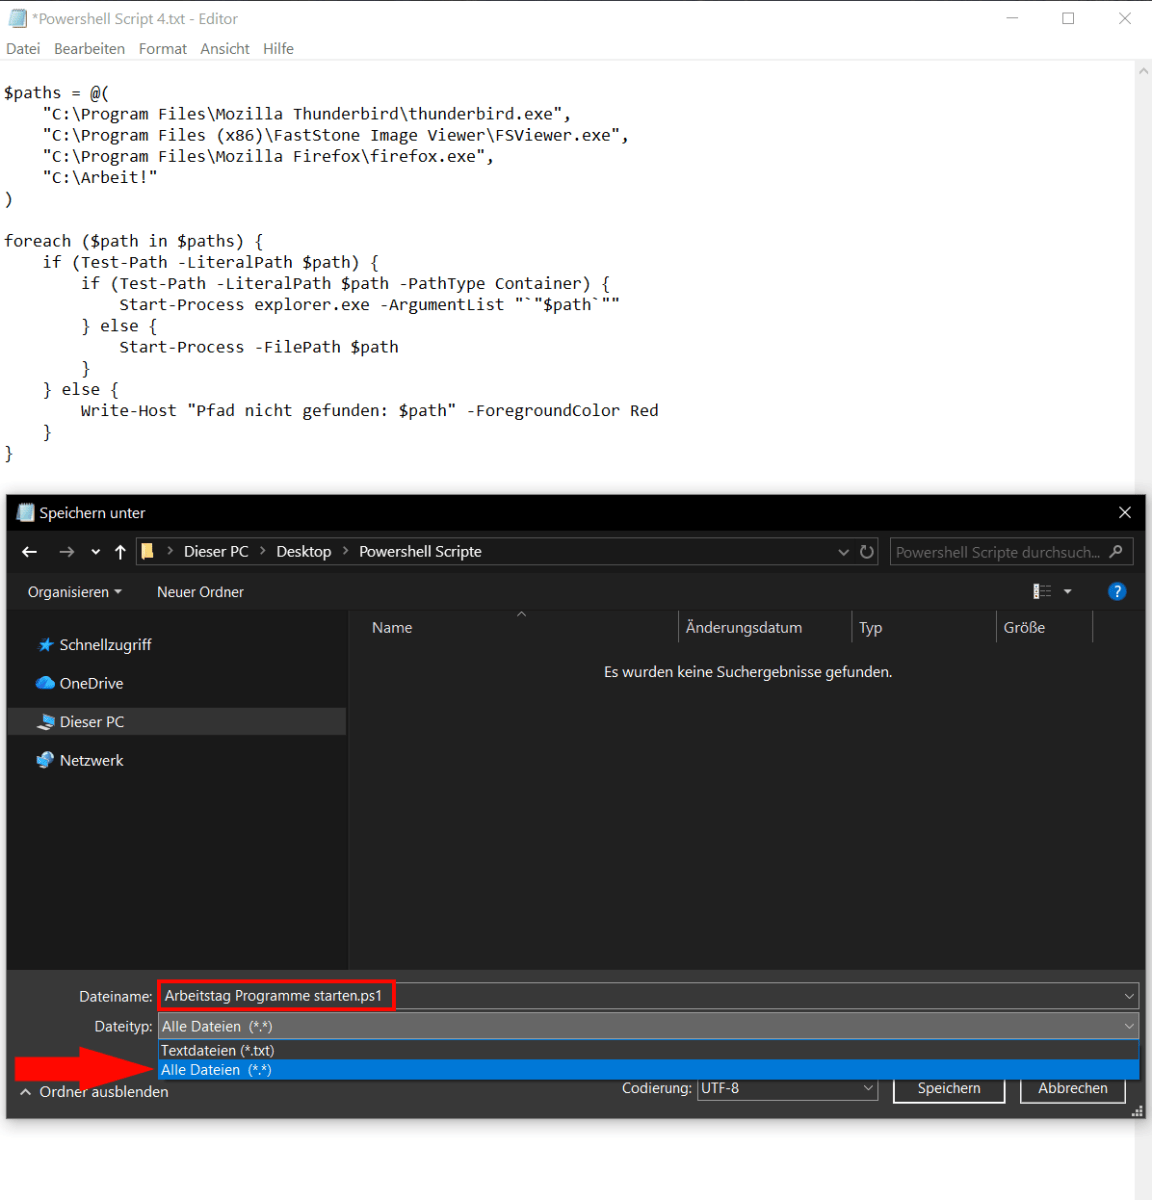
If you want to use a helper script you’ve created yourself on a regular basis, save the code as a PowerShell file with the .ps1 extension. To do this, open Windows Notepad, paste the code in and select ‘File > Save As.’ Enter a name such as MorningStarter.ps1 and set the file type to ‘All Files.’ Otherwise, Windows may save the file as a text file with the .txt extension — which means it cannot be run as intended.
Next, right-click on the file in File Explorer and select ‘Run with PowerShell.’ On Windows 11, you may first need to open ‘Show more options’ to do this.
If the option is missing, this is often due to a file type association issue or a problem with the PowerShell installation. On a work computer, contact the IT department in this case. On a personal PC, it may help to consult the Microsoft documentation on PowerShell — or to repair the PowerShell installation.
Handy little tools you can create yourself
AI makes PowerShell interesting even for beginners. As well as our examples, you can use it to tackle other tasks for which Windows doesn’t provide a suitable function. How about, for example, a tool that tracks down temporary files and memory hogs, compiles the most important hardware data for a support enquiry, or lists particularly resource-intensive programs? You can also quickly develop a script that checks your network connection or carries out several steps at once.
Feel free to try out your own ideas. When doing so, describe to the AI as precisely as possible what your script is supposed to do. Ask for an explanation of the code and check it before running it.
However, caution is advised — particularly with commands that delete files, change settings, or require administrator rights — and it’s a good idea to make a backup beforehand if necessary. This is how you can develop your own little Windows helpers, step by step, to suit your everyday needs.
This articles is written by : Nermeen Nabil Khear Abdelmalak
All rights reserved to : USAGOLDMIES . www.usagoldmines.com
You can Enjoy surfing our website categories and read more content in many fields you may like .
Why USAGoldMines ?
USAGoldMines is a comprehensive website offering the latest in financial, crypto, and technical news. With specialized sections for each category, it provides readers with up-to-date market insights, investment trends, and technological advancements, making it a valuable resource for investors and enthusiasts in the fast-paced financial world.