
You might be inclined to blame insufficient graphics performance for a Windows system’s failure to hit its limit during gaming. But often it’s memory and file access that slow things down. This is precisely where a so-called “dev drive” can help. This refers to a volume introduced by Microsoft based on ReFS (Resilient File System).
A dev drive is optimized for many simultaneous accesses to a large number of small files. This suits modern games, which are constantly reloading, unpacking, and discarding textures, shaders, configuration files, and streaming assets. In practice, this manifests itself primarily in shorter loading times, fewer I/O-related reloads, and overall more stable asset processing.
The benefits are particularly evident in open-world games or titles that often prepare shaders at launch. Before you make the switch, however, you should be aware of the limitations. ReFS does not support every NTFS feature. Individual launchers, tools, or older copy protection mechanisms may also react unpredictably. Furthermore, the benefits are only apparent on a fast SSD, ideally connected via NVMe. (See our roundups of the best PCIe 4.0 SSDs and best external drives for gaming for recommendations.)

A dev drive can provide a noticeable performance boost for complex games or programs — provided everything is installed directly on it.
HP
On SATA SSDs or even HDDs, the benefit is usually lost. Also important: A dev drive cannot be meaningfully converted back. If you want to revert to the NTFS file system, the only option is to reformat. Therefore, check beforehand whether your most important games and launchers run smoothly on ReFS. The setup can be done directly in Windows 11.
Open Settings using the Win+I shortcut and go to System. In the Storage section, go to “Advanced storage settings” and then to “Disks and volumes” under Drive management. Here you will find the option “Create a Dev Drive.” Now assign a size, drive letter, and name, confirm the process, and wait a moment until the drive appears in File Explorer.
The cleanest approach is to install games directly onto the new drive, as this ensures that all paths, dependencies, and caches are correct from the outset. In most launchers, you can create an additional library folder for this purpose. With Steam, you can also transfer existing installations — including dependencies — to the new drive using the built-in move function.
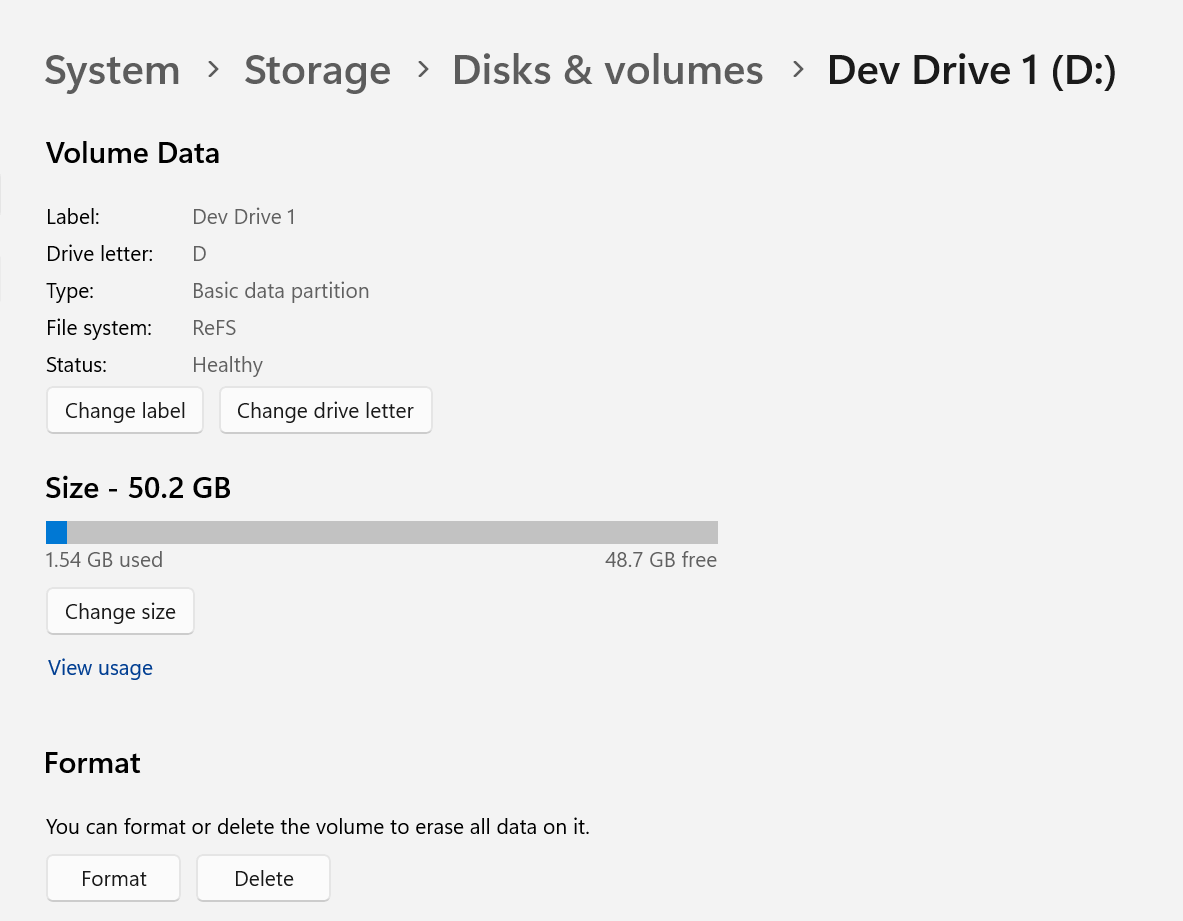
It’s quite simple to create a dev drive in the Windows system settings – provided you’re sure it’s suitable for your purposes.
Microsoft
With other launchers, the process varies depending on the title. Often, a fresh installation is the quickest way to achieve your goal. Ensure that cache and shader directories are also moved there; otherwise, some of the data access operations will still take place on the old drive. A dev drive is particularly worthwhile if you regularly install large games, frequently switch between games, or run a test system with many titles installed simultaneously.
If you only use a few games or already have very short loading times on a fast NVMe SSD, a standard NTFS volume is usually sufficient. Ultimately, the dev drive isn’t a gaming hack, but a practical storage optimization that, under the right conditions, can noticeably improve loading and streaming with little effort.
Related content
This articles is written by : Nermeen Nabil Khear Abdelmalak
All rights reserved to : USAGOLDMIES . www.usagoldmines.com
You can Enjoy surfing our website categories and read more content in many fields you may like .
Why USAGoldMines ?
USAGoldMines is a comprehensive website offering the latest in financial, crypto, and technical news. With specialized sections for each category, it provides readers with up-to-date market insights, investment trends, and technological advancements, making it a valuable resource for investors and enthusiasts in the fast-paced financial world.