
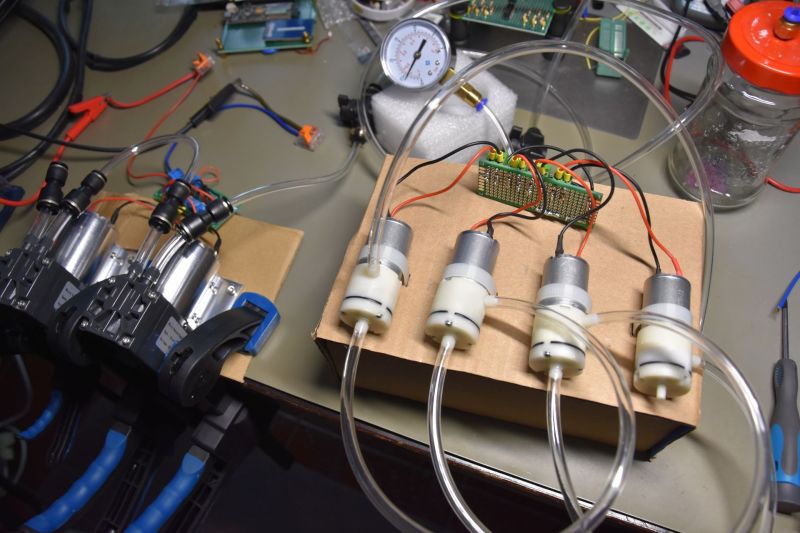
After previously exploring the impact of vapor pressure on the drying of desiccant and more, the conclusion was essentially that in order to drive moisture that’s not directly on a material’s surface out of it, you pretty much have to heat up said material to make the process not take forever. Of course, we’d still want to retain the vacuum while doing said heating, which raises the question of how you best heat something that is inside a vacuum.
Fortunately, this is a solved problem, with commentators to the previous article helpfully pointing to the existence of devices like vacuum ovens. Of course, you can either buy such a device and not worry your pretty little head about the finer details, or you can defy convention and build one yourself because you’re a rebel and really want to know how their internals work.
Thus in this article we’ll be taking a look at the finer details of generating thermal radiation and how to best heat up a sample inside a vacuum chamber without directly picking easy mode with microwaves.
Defining Hotness
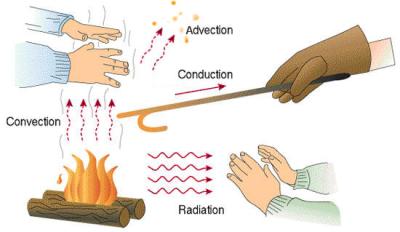
Although to our primate brains the concept of ‘hot’ and ‘cold’ are fairly intuitive, it can be harder to grasp exactly what happens when we experience for example warm sunshine, or shiver after stepping onto a particularly chilly tile floor during winter. Here we are talking about thermal energy, or more succinctly the kinetic energy of individual molecules. In the first example of sunshine on our skin it is primarily the infrared radiation in said sunshine that increases the kinetic energy of molecules in our skin, a change that sensors in the skin signal our brain about, resulting in a change in our overall happiness status.
In both cases we are however talking about heat transfers, something which can take place using a couple of mechanisms:
- Advection – the physical motion of matter between locations.
- Conduction – the transfer of energy via physical contact.
- Convection – transfer via fluid motion, like rising hot air.
- Radiation – transfer via the emission and absorption of electromagnetic radiation.
The warm sunshine here is thus an example of heat transfer via radiation, while the contact between one’s bare feet and the cold tiles is an example of conduction.
A Vacuum Isn’t Hot or Cold
In a total vacuum, all you have is transient radiation. This is basically why we can feel the Sun’s warm rays despite the inhospitable vacuum outside the Earth’s atmosphere, unless clouds get in the way. From this we can already deduce that the only practical way to heat up a material inside a vacuum chamber is through some form of electromagnetic radiation.
One exception here is of course if said material touches at least one side of said vacuum chamber, as in this case we do in fact have conduction as a viable transfer mode as well. Of note is that such a thermally conducting section of the vacuum vessel also begins to radiate energy, making it a two-for-one. This thus leaves us with a fun engineering challenge of how to use these facts to our advantage.
If we were to heat up the walls of the vacuum chamber, we’d use radiation to heat any object inside said chamber, while also using conduction for the parts of the object that touches these walls. The same would apply if we put a heating element inside the chamber, which thus leaves us with two possible approaches:
- heat up the entire chamber
- power a heating element inside the chamber
Obviously the latter option should be more efficient since in this case we’d not also be conducting, convecting and radiating the energy away from the chamber into the surrounding air and the surface it’s placed on. This just leaves us with the question of how to get power for the heating element into the vacuum chamber.
Wireless Power
Although it’d be possible to simply use a battery wired up to a heating element and stuff that into the vacuum chamber, this is just a bit silly, as it’d make for a rather non-ergonomic setup. It’d also make it rather clumsy to turn the setup on and off, get in the way of loading objects for drying and you’d be exposing the battery or powerbank to conditions it really wasn’t designed for.
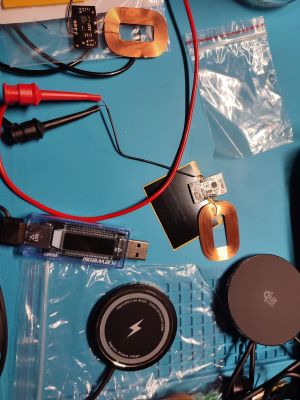
Fortunately we could have our cake and eat it too, courtesy of the magic that is wireless power. Specifically technologies like inductive power transfer, whether something such as that used with inductive cooking stoves or something less aggressive like the Qi standard as used for wirelessly charging smartphones and other gadgets.
This approach was the first that I pursued, which resulted in me mostly learning a little too much about which transmitters and receivers like to work with each other. Some receivers only accept 5 V, for example, so when the transmitter insists on picking 9 V as its starting voltage, it doesn’t work. With this and other issues I wasted a fair bit of time.
There is also the limitation that Qi is limited to just a few millimeters between the coils and requires fairly precise alignment, all of which put additional constraints on its usage. Fortunately there is a far easier method that’s not wireless, but does involve bananas.
Although I haven’t discarded the idea of using Qi or something more spicy in the future, it’s definitely a lot more fiddly than just stabbing a piece of copper through the walls of a vacuum vessel and pumping power through that.
Banana Power
In the world of expensive lab equipment you call such power and signal passthroughs ‘vacuum feedthroughs’, and often involve epoxied wiring in a fitting that costs a considerable amount of money. While probably easy enough to DIY if you do not go for an ultra-high vacuum, there’s even an easier, off-the-shelf and very affordable option.
In the parallel world of both speaker and general equipment construction there is often also a whole thing with keeping air where it should stay, and plugging and sealing gaps that it could escape from. Although not directly related to vacuum chambers itself, this basic principle does mean that you can use something like banana plug terminals for power and signal passthroughs for vacuum chambers.
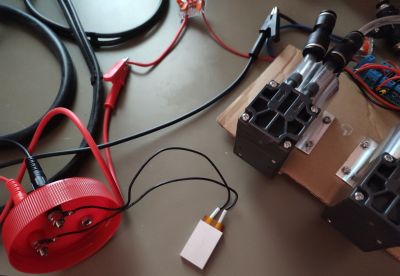 Also found in various other types of gear, these terminals are cheap and plentiful, and if you get the right one it should have a nice flat, sealing surface that you can seal against. Pick a 4 mm size if you want to also jab your regular bench power supply and multimeter leads into the terminals directly.
On the cheap terminals that I dug out of my stash they had this helpful flat surface. This I thus used to put a silicone O-ring on to hopefully fully seal up the hole that I had just made in the plastic lid of yet another unsuspecting jar. Along with a second terminal and a PC6-M5 pneumatic quick connect mounted on the same lid, it was now time to solder the PTC heating element to the inside of the lid.
For an initial fit test I put a sample baggy of forbidden candy stuffed alongside this heating element into a container made out of aluminium foil, with the idea that it further reflects radiative heat and thus increases efficiency. Although sample insertion is a bit of a pain, it should suffice for basic testing.
Hot Candy
As usual, the sample object is a small bag of color-changing desiccant, specifically from dehydrated blue to hydrated pink. When loading it into the vacuum chamber, the desiccant was a solid light pink, weighing in at 3.25 grams including the plastic bag.
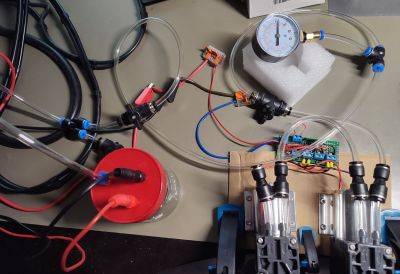 The PTC element self-regulates to a rated 70 °C when fed with 5 VDC. Using a K-type probe I was able to previously quantify its heating behavior, with it initially drawing close to 1 A during its heating phase until levelling off to about 0.3 A as it approaches 60 °C. Since this was measured directly on the aluminium containing the actual heating element I assume that the final temperature that the desiccant will be exposed to will be about a 65 °C surface.
I loaded the sample so that it was contacting the heating element, to give it the best chance of conducting as much heat as possible. With this I will be running a range of tests, mostly to determine the effect of drying at various levels of duration. The goal is to use a vacuum of at least -0.8 bar using the dual-stage eccentric diaphragm pump that I built previously.
The Microwaved Elephant
When you look up at how people dry something more common like desiccant, you can find a range of options, including using an oven, a dehydrator and also a microwave. This latter item makes a lot of sense, since the sole purpose of the microwave is to make water molecules go faster, with them correspondingly zipping out of the material more easily, often as little as a few minutes for a bowl of desiccant.
This raises the obvious question of why one shouldn’t simple use a microwave for all this drying of desiccant as well as FDM filament and so on. The simple question is probably that this process is quite aggressive, with many reports of microwaved desiccants doing rather bad things, as well as generally just cracking and suffering other mishaps.
The likely cause is probably that too much energy is being imparted at once, which thus stresses the surrounding material. This is where taking some time may be beneficial, but without doing more research on this topic it’s mostly conjecture on my end. The prospect of using lower levels of microwave radiation instead of a PTC heater is a tempting one, naturally.
With that out of the way, stay tuned for the next installment as I try to manage an increasing number of pneumatic ball valves, bench power supplies and tubing while finishing up this first round of hot vacuum testing.
This articles is written by : Nermeen Nabil Khear Abdelmalak
All rights reserved to : USAGOLDMIES . www.usagoldmines.com
You can Enjoy surfing our website categories and read more content in many fields you may like .
Why USAGoldMines ?
USAGoldMines is a comprehensive website offering the latest in financial, crypto, and technical news. With specialized sections for each category, it provides readers with up-to-date market insights, investment trends, and technological advancements, making it a valuable resource for investors and enthusiasts in the fast-paced financial world.